Recently I’ve found myself slacking a bit on goals last month, and although I had (in my humble opinion) an AMAZING February plan with me theme and layout page for my goals I needed to switch some things up. Que the one-page weekly spreads! This way I can keep track of all of my tasks on one side and the other page can be used entirely for tracking my goals. That is the plan, so what could go wrong? Stay tuned for my April plan with me and I will let you know!
When it comes to planning out anything in my bullet journal, I always want to make it as easy as possible. The same can be said when creating different one-page weekly spread ideas. Especially during those busy week so it’s always nice to know how to save time on bullet journaling.
Supplies Used
Scribbles That Matter Dotted Bullet Journal – (US) https://amzn.to/3oDjWee
Sakura Micron 6-Piece Set – (US) https://amzn.to/30oGBSl (CAN) https://amzn.to/39ljTf7
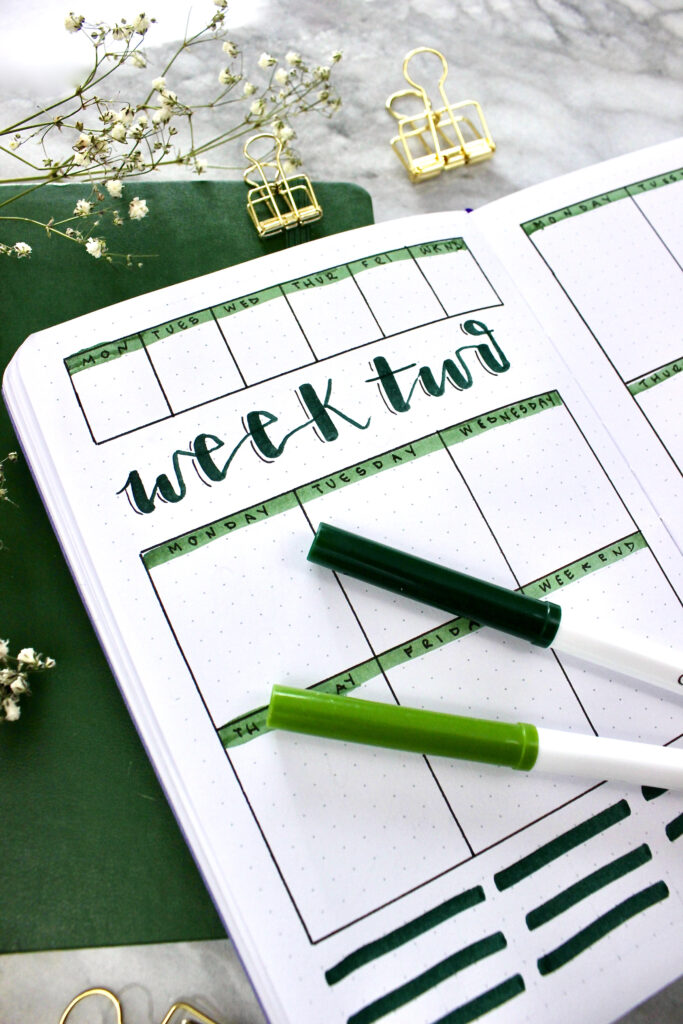
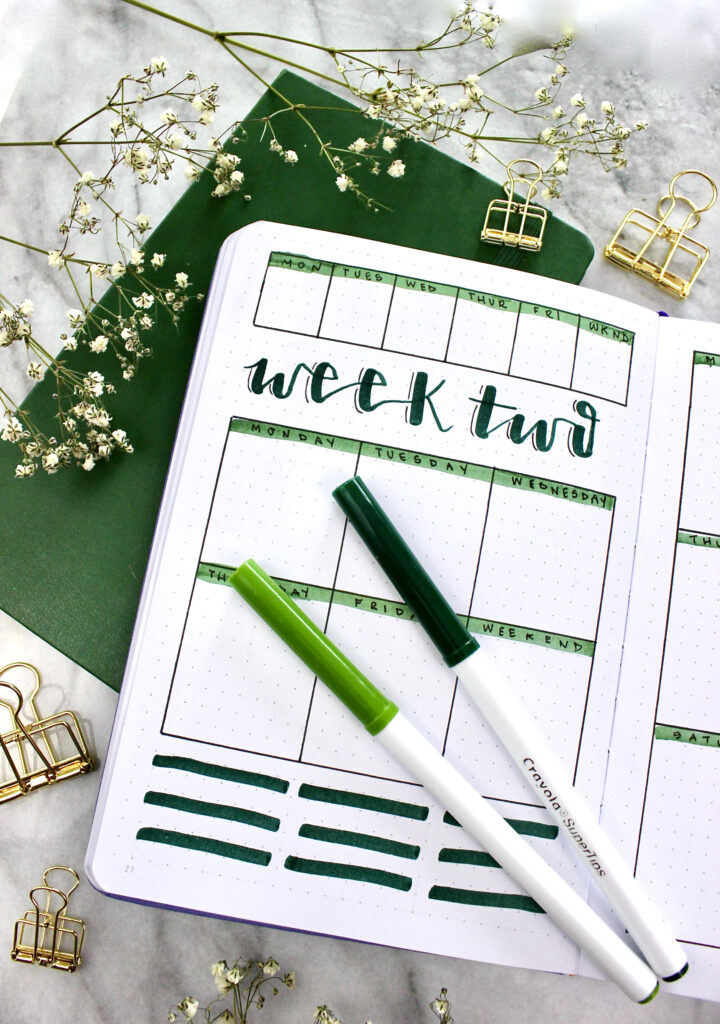
Crayola Supertips 50 pack – (US) https://amzn.to/3BLsqVm (CAN) https://amzn.to/2Q0GMye
What Is a One Page Weekly?
One page weekly’s focus all of your tasks on one page. When you’re looking at your journal open flat, you have two sides of the page to work with; left and right. Instead of expanding your weekly spreads over two pages, a one page weekly condenses the information. For me personally I have found that having less space to work with helps me prioritize the tasks that I actually need to get done. It is so easy for me to jam pack my day full of all the tasks that I want to get done and realistically that isn’t always possible. More often than not, I feel defeated if I notice that the majority of my tasks (or the ones that I really should have gotten done) are incomplete.
Why Should I Use a One Page Weekly?
First and foremost, one-page weeklies are by far the quickest and simplest bullet journal layouts. By reducing the amount of space that you are working with it takes a bunch of time off of planning out the week. The one thing that I personally love is that you’re able to customize your weekly spreads to fit exactly what your needs are. I always like to say the basics of bullet journaling start with knowing what you want to track in your life and how it adds value to your life.
How To Create a One Page Weekly?
Sometimes it’s not always easy coming up with weekly spreads. So let me just start with some of the tips that I use when planning out any spread in my journal. Before I plan out any weekly spread, the first thing that I think of is how many days do I want to include; six or seven. If I know that I’m having a busy week with tasks every day, I know that I would want to include seven days. If I know that maybe I’m having a weekend off or going on a vacation (taking really any type of break) then I would structure my weekly spread a little different. I may end up combining days together, like Saturday and Sunday, if I am out of town that weekend. Or sometimes just remove the day all together.
Now, the number seven might not be the easiest to divide in a spread unless you’re coming up with horizontal boxes all the way down the page. So, one trick that I like to use when creating weekly spreads is instead of dividing the page and odd numbers, I divide the page into even numbers: half, quarters, sixths, eighths etc. What ends up happening is I take the number of boxes I need dedicated to my daily tasks and the remaining can be used for other different tracker ideas; mini calendar, a quote, goals, sleep/mood/gratitude tracker. The list is really endless.
Different One-Page Weekly Ideas
Below are 10 different types of bullet journal one-page weekly spread layouts. When looking at everything below, keep in mind that these minimalistic weekly spread layouts can be used and switched around to accommodate your life. Maybe something that I’ve included or the way that I structure it, isn’t necessarily going to benefit you and your week. So don’t use it! Switch up the spreads a little by moving around the boxes, changing the shape or colour I used. Maybe you like the layout by want more room? Expand it over two pages instead! I do all of these things when planning weekly spreads in my bullet journal. I use the spreads as a starting point and switch it up based on what will add value to my life in that week.
Spread One
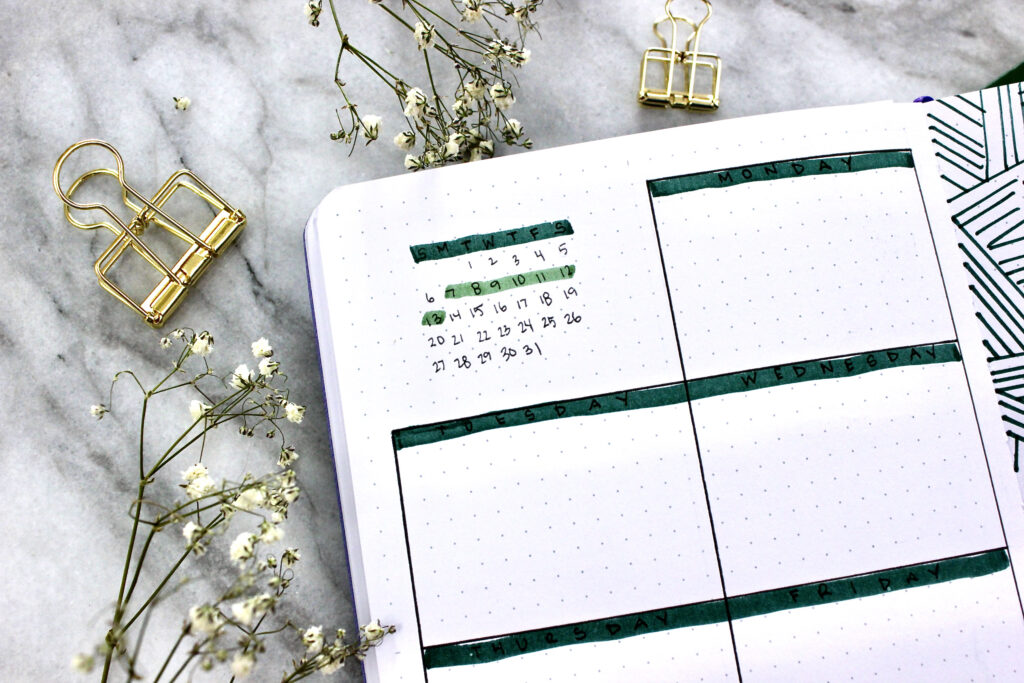
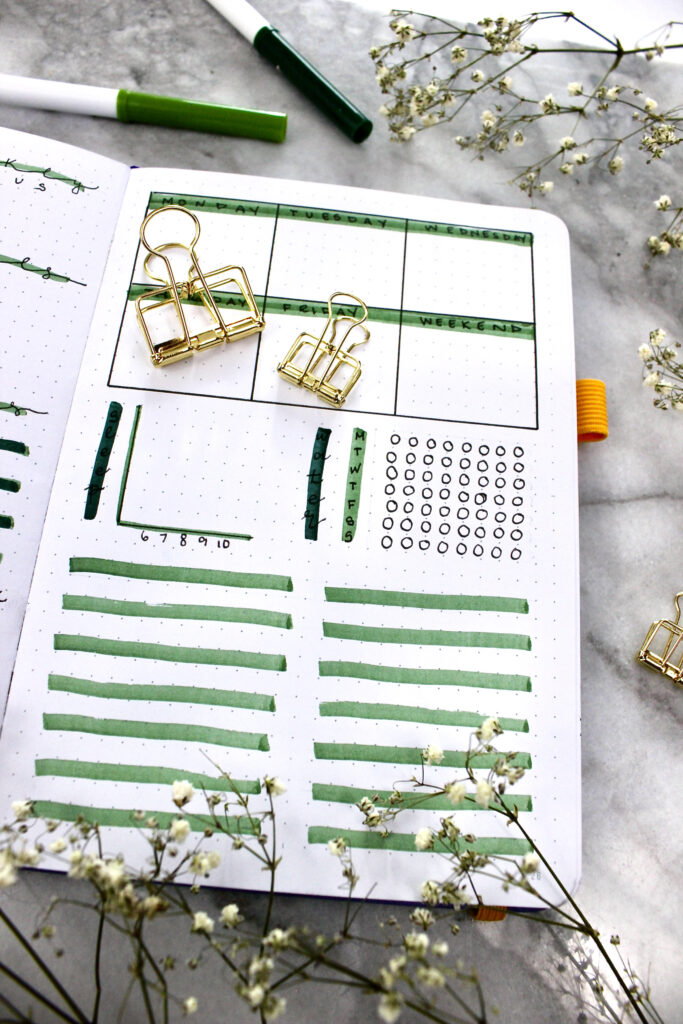
The first bullet journal weekly spread layout I divided the page into eight different boxes. The first box in the top left corner I ended up leaving blank. The remaining seven boxes were filled in by each day of the week. For me personally I always love to reference what day of the week I’m actually on, so that top box I filled in with a calendar. Each box is 6 cm long x 4.5 cm tall (12 dots x 9 dots in my Archer and Olive A5 journal), with one dot around the entire box.
Spread Two
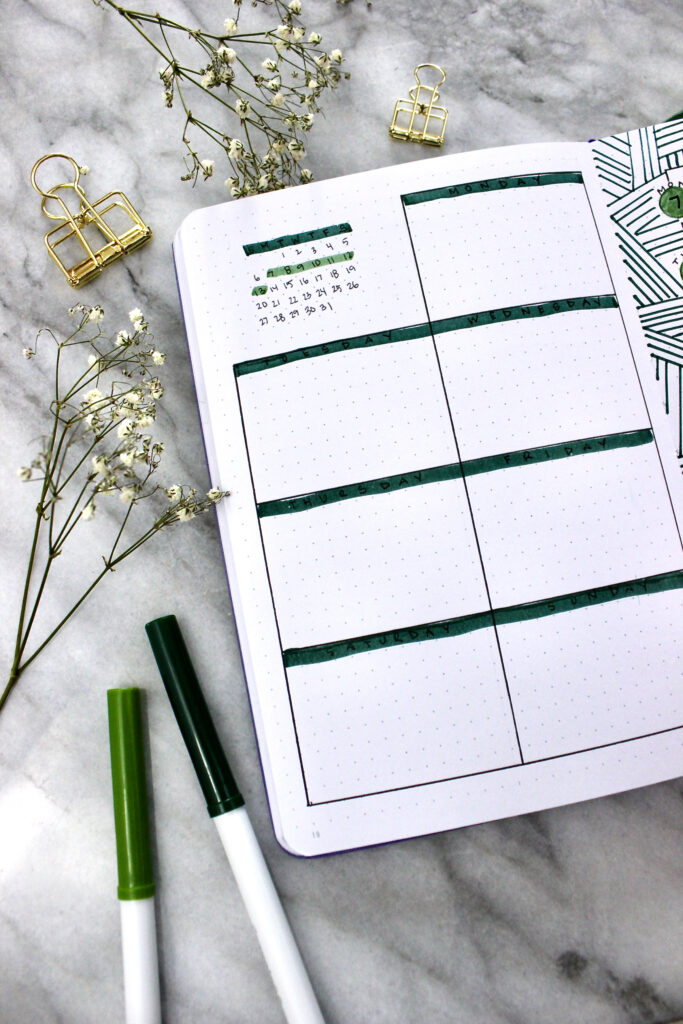
One thing that I like to do when creating different spreads in my bullet journal is to add some sort of statement piece to the layout. That can be in the form of watercolors, a bold color, or a pattern design. In the second spread I decided to divide the page horizontally into seven boxes. Each box is 10 cm x 2.5 cm (20 dots x 5 dots) with 3 dots on the left and ride of the box, and 2 dots on the top and bottom. In having a larger border this allows room to make that statement piece I was talking about. For this weekly spread I ended up doing a geometric design of sets of parallel lines going in different directions.


Spread Three
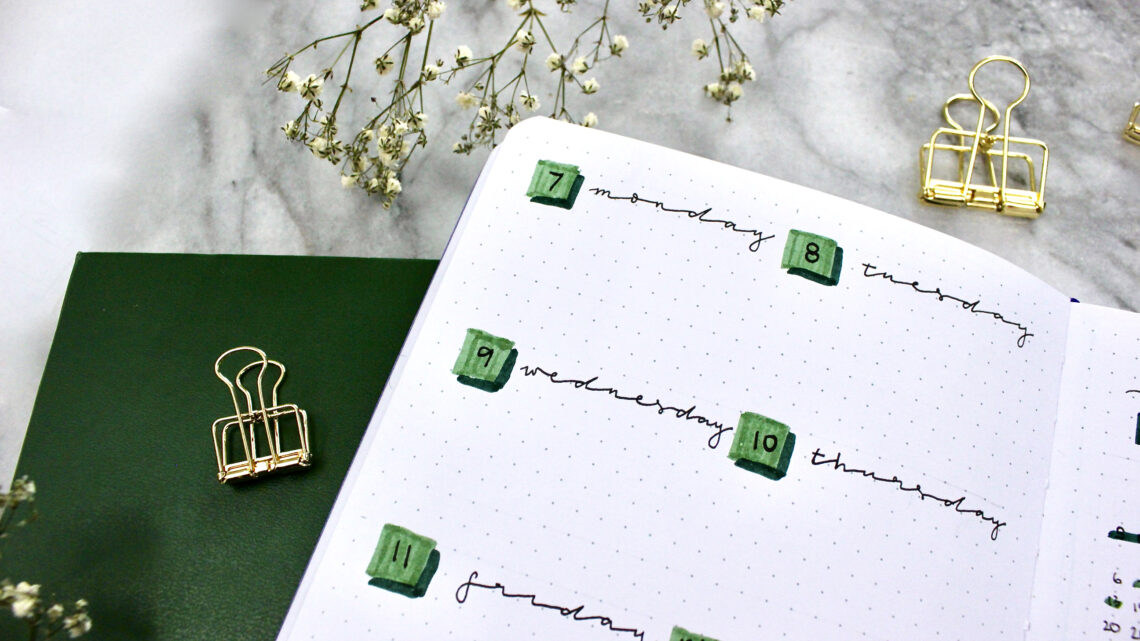
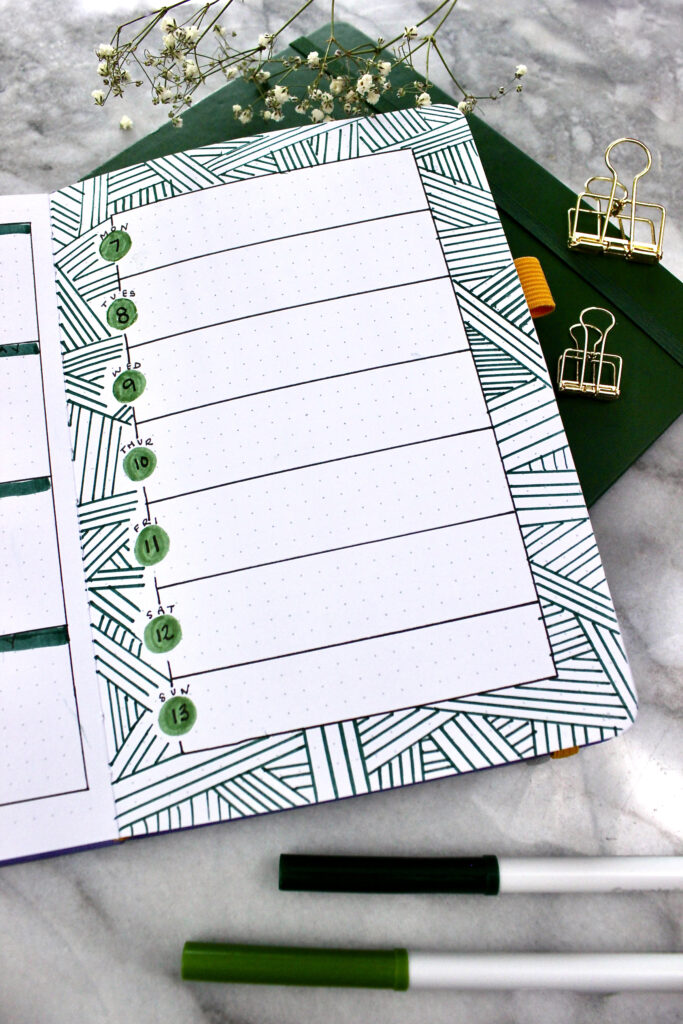
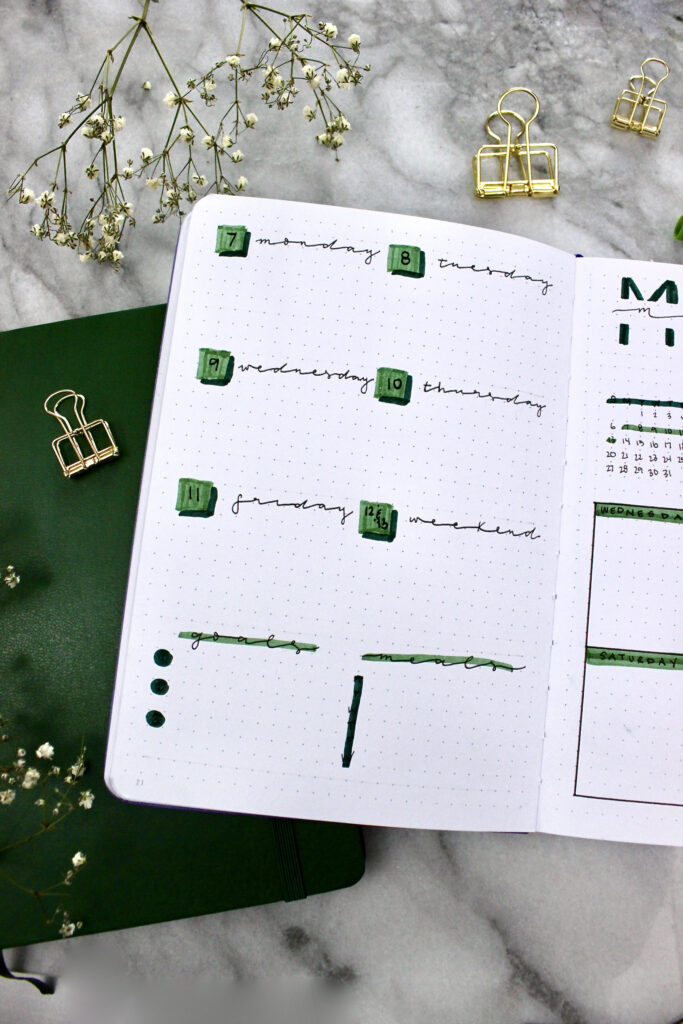
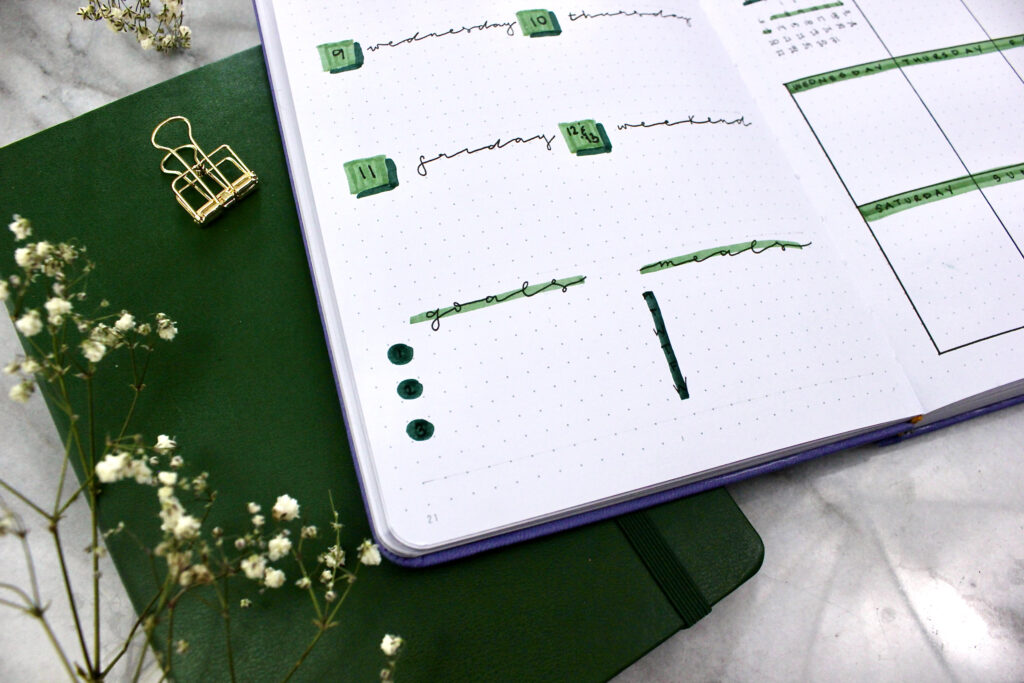
I divided the page this time again into eighths; however, instead of closing the boxes, I left them open and divided the page by using the number and day of the week (7 – Monday). The top 3 quarters of the page are dedicated for my daily tasks. While the bottom quarter I’ve left open for goals that I want to accomplish and meals that I plan to eat. Each box is 6 cm x 4.5 cm (12 dots x 9 dots) with one dot around the entire box. By having only six boxes in the top for my daily tasks, this is one of the cases where I would end up combining two days together: the weekend this time around.

Spread Four
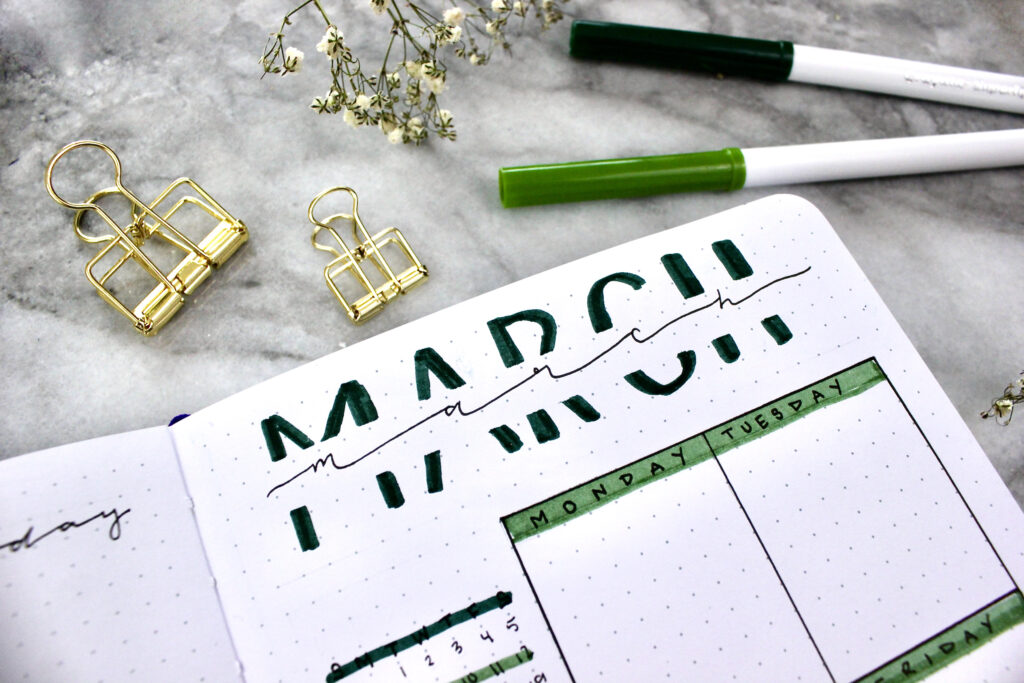
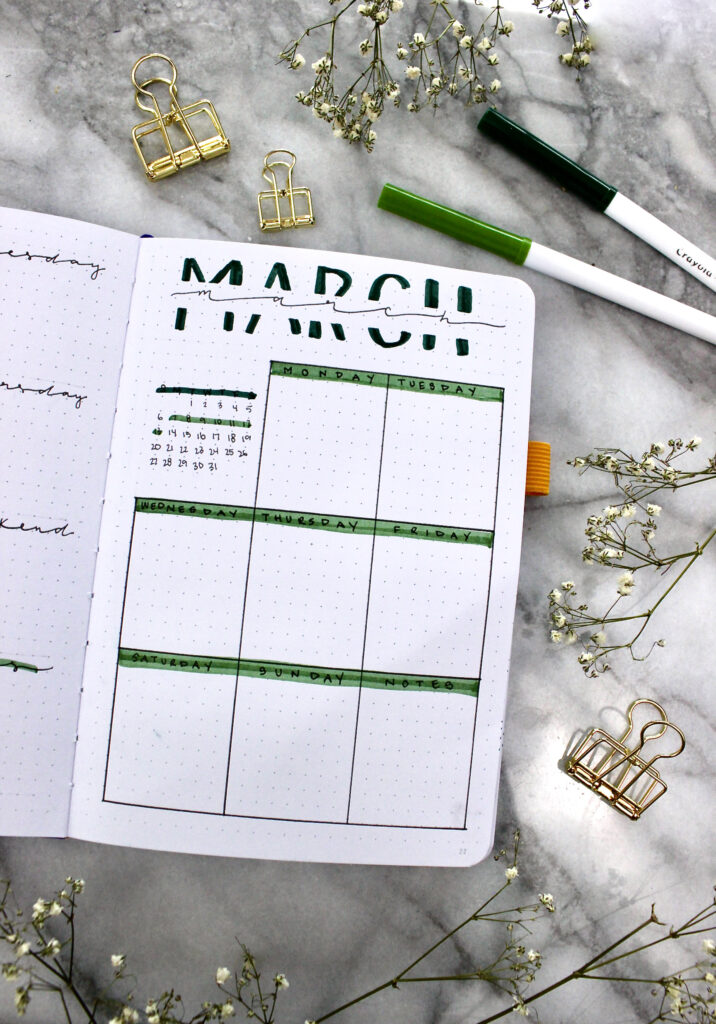
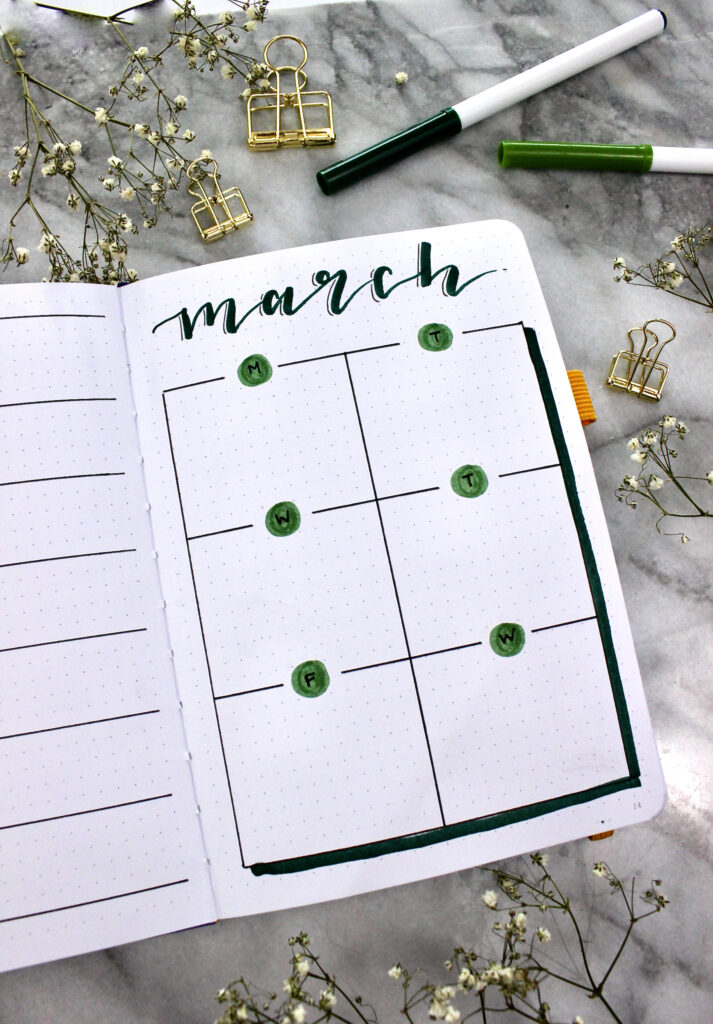
I can’t help but add different flourishes to the spreads in my bullet journal. More often than not they take the form of fancy lettering styles or painted doodles. I find it helps me channel my creativity but figuring out exactly how to make those items work in a weekly spread can take a little time. Look at it this way… we already know that it’s easier to divide the page into even sections. So, when I remove part of the space that I work with, it doesn’t change that fact. It simply means that the space I have to work with is smaller. Each box is 4 cm x 5 cm (8 dots by 10 dots), leaving enough space at the top of the page for a bold header. Since this time around the page was divided into nine boxes, that gives me seven spaces for each day of the week and two leftover spaces for different spreads. In the top left box, I filled in a calendar and the bottom right box I just left for notes.
Spread Five
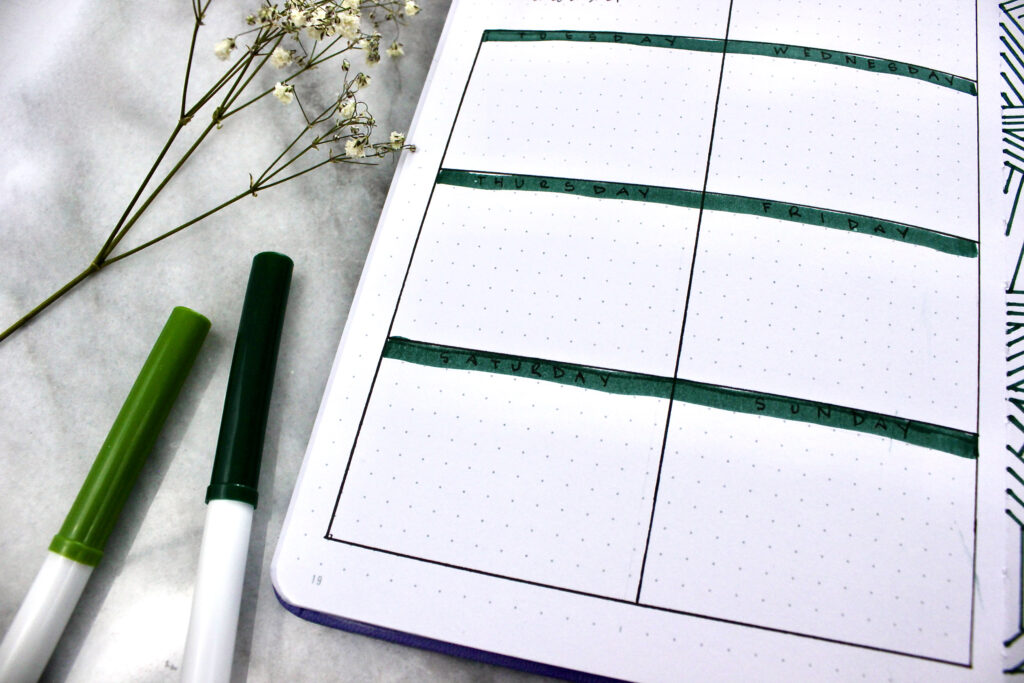
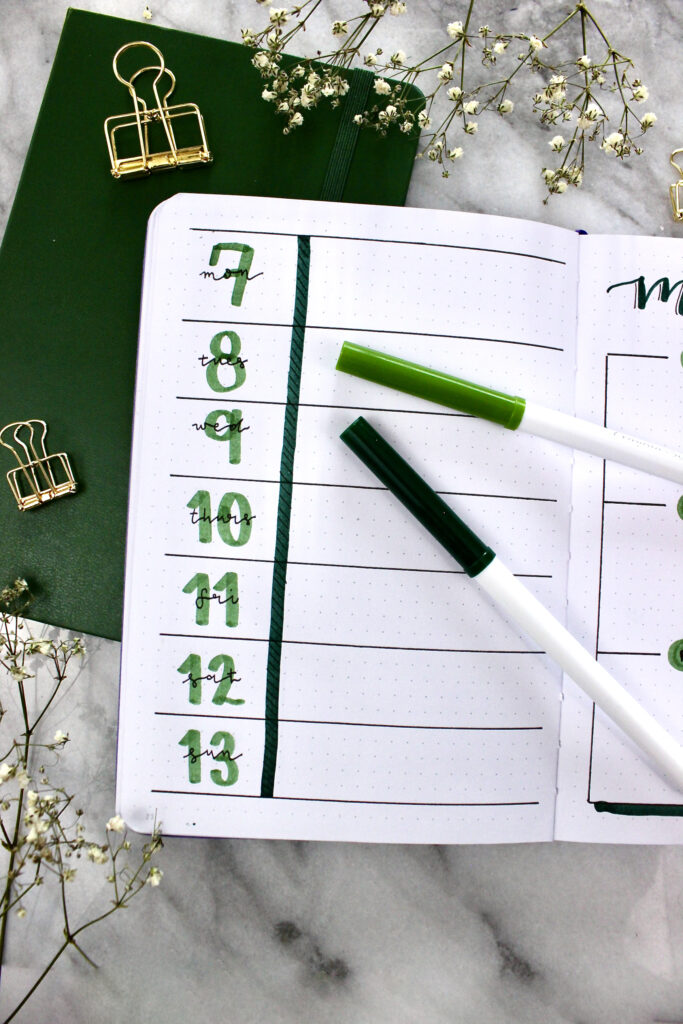
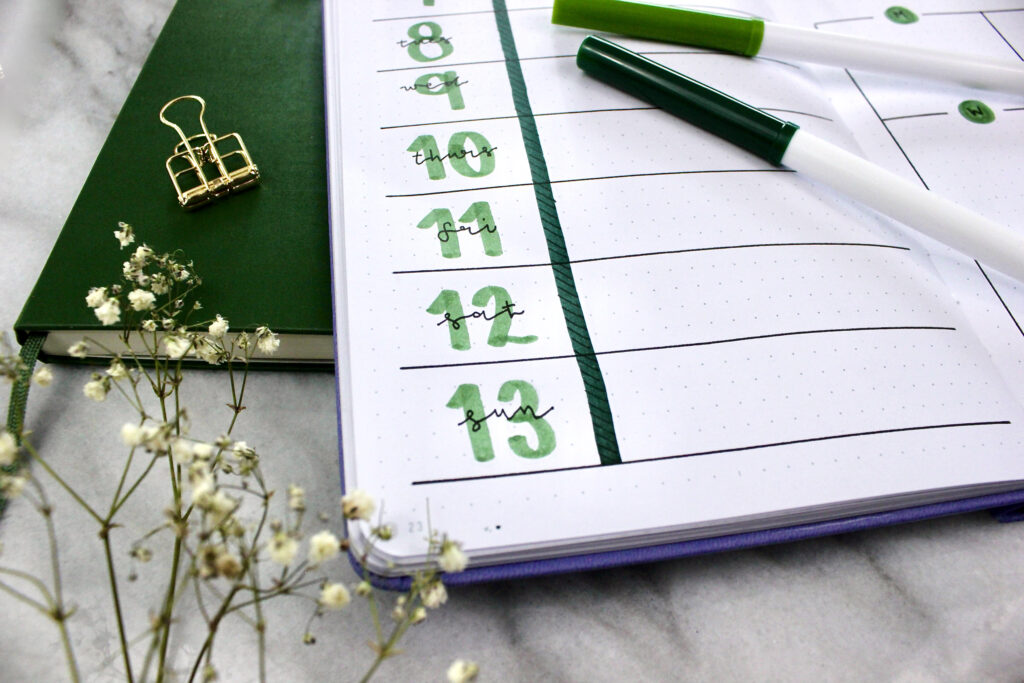
For those days that I’m in a rush or my brain really doesn’t want to think of a new creative spread, this is a minimalistic weekly layout that is quick and easy to achieve. Each box is 12.5 cm x 3 cm (25 dots x 6 dots). On the left side of each of the sections, I bordered off an area to write out the day and number of the week. The nice thing about the spread is that you can leave as much room or as little to write it out. This time around I took up 3.5 cm (of the 12.5 cm) and dedicated it to just that. What makes this piece look nice to me is the cursive lettering over top of the number. It’s a subtle way to add a little something something to the page.

Spread Six
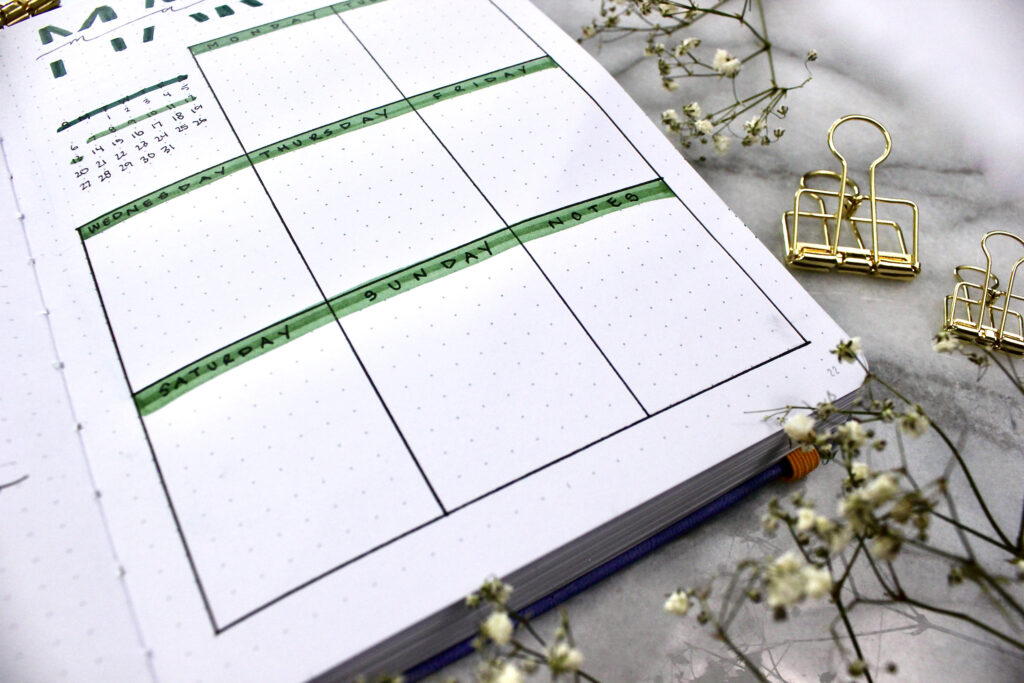
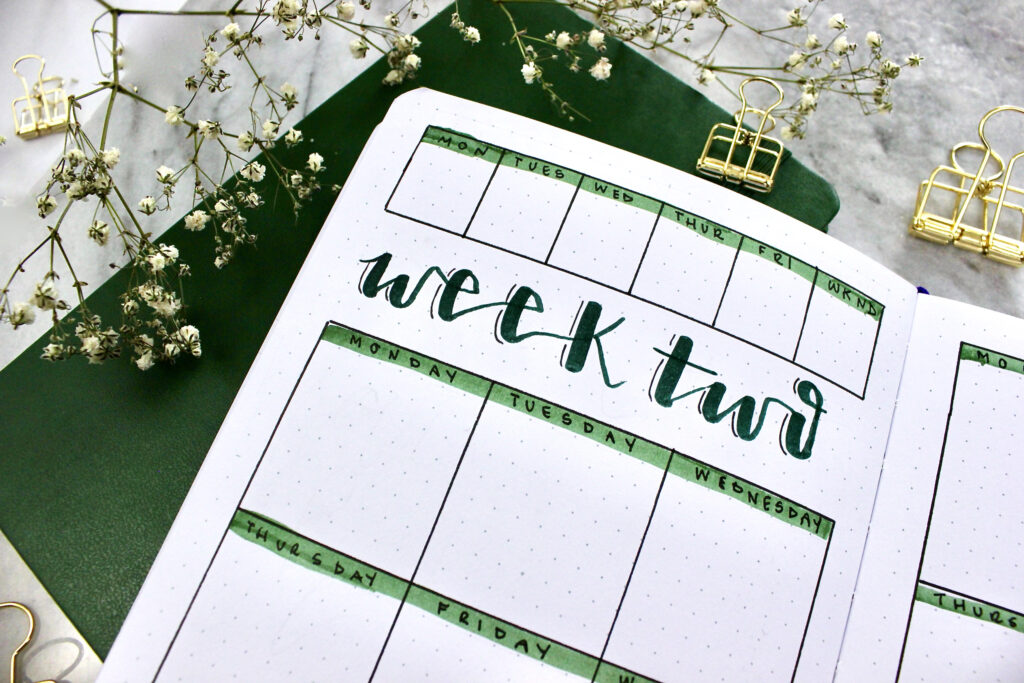
Spread number six I think it’s a really good example of combining the different techniques that we’ve already seen so far. I wanted a bold lettering at the top of the page (spread four), divide the page into six boxes (spread three), and kept the overall look minimalistic so that it is quick and easy to achieve on those busy week’s (spread five). Each box is 6 cm x 5 cm (12 dots x 10 dots), leaving room at the top for the cursive lettering style. One thing that I think helps ground the page a little bit more is when you add a drop shadow. Especially once you start adding in all of the tasks that you want to get done, things can get a little bit chaotic looking.


Spread Seven
Now we’re getting into the more complicated spreads! The spread may look a little bit intimidating, but I’m hoping that once I help break it down, you’ll be able to come up and create the spreads all by yourself. Step number one I divided the page in half. On the left half of the page is where all of my tasks and events are going to go for the week into the seven even boxes. Each of those boxes are 6 cm x 2.5 cm (12 dots x 5 dots) with one sneaky box being 3 cm tall instead. There is another trick for you if you are ever having an issue with dividing the page evenly; divide it as evenly as possible and take the excess onto a box or two. The right half of the page I ended up breaking down into four different sections. Each section ranges in size based on how big of a space I need for the different tracker that I want. The weekly focus and goals section are smaller than my weekly tasks and workouts section, solely based on the needs I have and what I wanted to track during the week.


Spread Eight
Coming up with spread number eight may take a little bit more preplanning. I knew that I wanted to have an area to track my sleep and water consumption every single day. That meant that I needed at least one row for each day of the week; 3.5 cm tall (7 dots). Taking that amount away from the total space that I have to work with, left me with about 14 cm (28 dots). I took a very similar approach as the last spread, with wanting one area for my top tasks or events and a separate for the weekly tasks that don’t necessarily have a specific day. The easiest way I thought of doing that was to take the remaining 14 cm and divide it in half. Sometimes it’s just better to make life simple. Each box on the top half is 4 cm x 3.5 cm (8 dots x 7 dots), combining the weekend into one box. The bottom section I divided in half and coloured in every other line, leaving room for the different things I want to get done during the week.


Spread Nine
Here’s a perfect example of how you can use different layout designs for different trackers. The top row of boxes our dedicated as a meal tracker. Each of these mini boxes are 2 cm x 2.5 cm (4 dots x 5 dots). Just because I originally planned to have them to write out what meals I want for the day doesn’t mean that is its only purpose. It could be used to fill in what the weather was for the day with a doodle, what events are upcoming and so much more. The reason why I like having these top boxes is that it helps divide different ideas on your page. The middle set of boxes are each 4.5 cm x 4 cm (9 dots x 8 dots). Here I would write in all of the tasks that I want to get done for the day but also left room at the very bottom of the page for task that are generic and don’t have a designated day.
Spread Ten
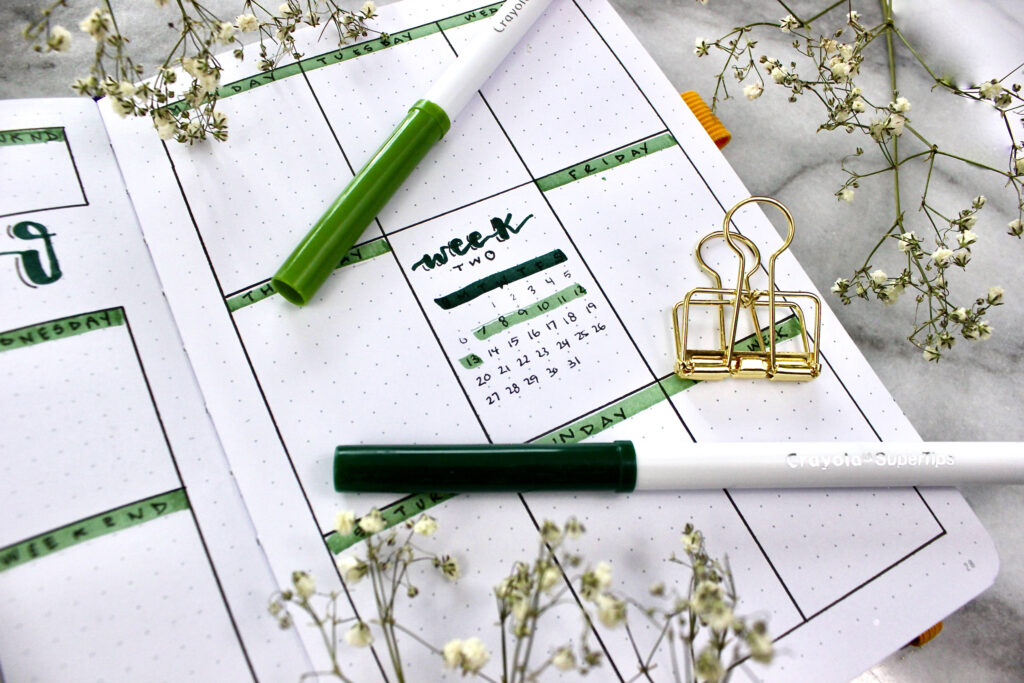
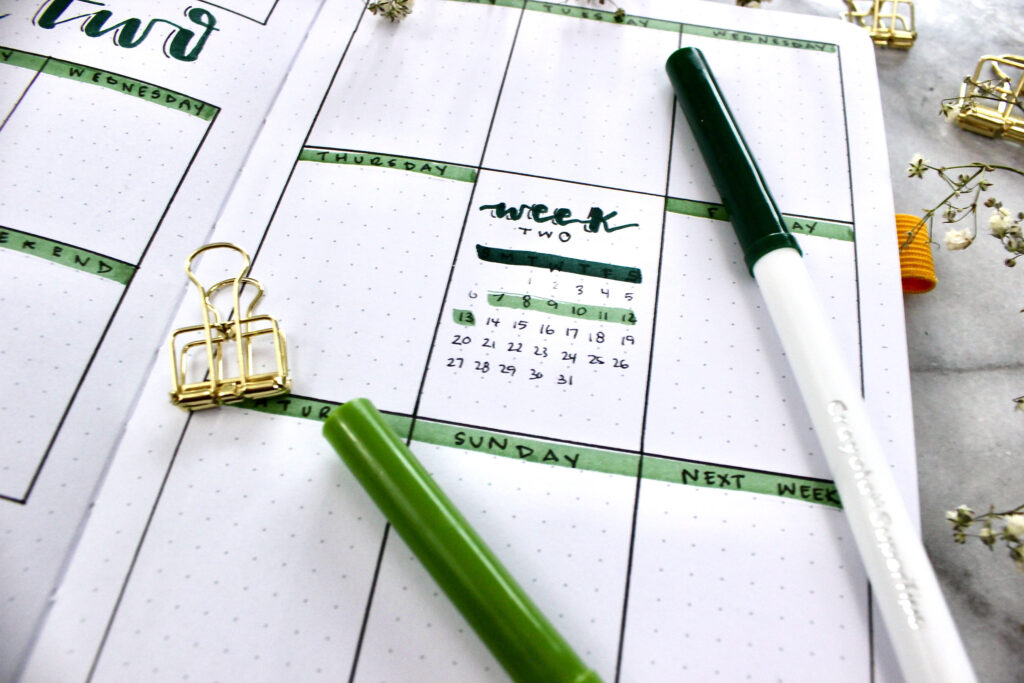
The last spread I wanted to keep it simple. I divided the page into a 3×3 grid, making nine equal sized boxes. Each box is 4 cm x 6 cm (8 dots x 12 dots), having 7 boxes for the day of the week, the middle box as a calendar and the bottom right box for a list of tasks for next week. The nice thing about this layout is that you can switch out where you put those blank areas. Personally, I decided to have the centre box remain empty, that way it looks a bit more uniform going around the page.

Hopefully this helps give you a bit more insight into the inner workings of my mind when it comes to creating different weekly spreads. Are you usually the type of person who gravitates towards a more one-page weekly spread or a two-page weekly spread? For me it continually switches based on my needs and more recently it’s been a good one page weekly.
Cait